Showing posts with label diy project. Show all posts

Thursday, August 2, 2018

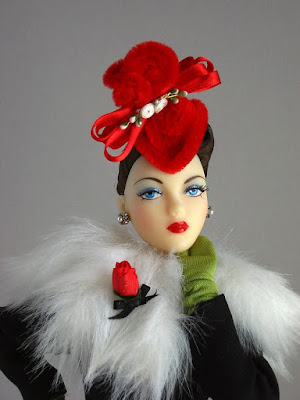
Captivating Chenille Hats for Fashion Dolls

An Easy DIY Project  


You won't be able to stop making these colorful and playful hats for your favorite fashion doll diva.  They are easy to make and perfect for any season and any occasion.

Walking Suit Silkstone Barbie

Vintage reproduction Barbie


Here's what you will need:

  • Chenille pipe cleaners, 12" length.  
  • Craft scissors.
  • Pen.
  • Assorted trims.
  • Glue to attach trims.  Sobo or Fabri-Tac work well.
  • Doll "hat" pins.
  • Felt for lining,  optional.


Begin by taking one 12" pipe cleaner and wrap one end around a pen approximately 4 times as shown above.  Slide the loops off the pen.  At the opposite end bend the pipe cleaner 1/4" and slowly wind into a spiral shape.  This will form the base of your hat.  Continue winding the spiral until it meets the lower loop.  

The arrow in the photo above shows the positioning of the lower loop at the back of the hat.  Gently bend the remainder of the loops up towards the top of the hat.

Viola....your hat is ready to trim.

Black & White Bathing Suit Silkstone Barbie

Here is a simply chic variation.

"Haute Luxuries" Veronique Perrin.  Dress from Bogues Vogues.

This ultra easy, chic hat uses one 12" pipe cleaner.  Form the circular base stopping approximately 2- 1/4" from the end. Loop as shown above.  Turn it over and trim as desired.

Shown in 1:6 Scale

These stylish hats can easily be adapted to the 1:4 scale size dolls such as Gene Marshall and friends.


J'Adore Gene Marshall
You will need two 12" pipe cleaners.  Form a circular base from one of the pipe cleaners.  For the crown section of your hat, use another pipe cleaner to make the loops.  You can play with the size and shaping to get the effect you want.  The crown section can be attached to the base with a small amount of glue.  Let the glue dry thoroughly.  You can also use a pipe cleaner.  Depending on your design, it can be threaded through the base, twisted, or pinched to secure.

Cocoa Crisp Gene Marshall
A rich forest green base accented with brighter apple green loops gives this smart topper panache.

White Orchid Gene Marshall
A charmer demonstrating the different looks you can achieve with a little imagination.  I hope you enjoy making these delightfully whimsical hats.

Credits:

Barbie is from Mattel.
Veronique Perrin and Cocoa Crisp Gene Marshall are from Integrity.
J'Adore and White Orchid Gene Marshall are from JamieShow.
All hats and styling are from The Couture Touch.


Monday, October 24, 2016

Repurposing a Found Object to Make a Felt Fashion Doll Hat

Miss Gene Marshall


This delightful 1950's era lampshade style hat was made from wool felt molded over a found object....in this case, an old vinegar bottle. You can easily make stylish hats for your favorite miniature diva by using simple objects as a hat block.

The first thing you'll need is an appropriate bottle for your hat. You might just find the perfect one in your kitchen or bathroom. If not, check out the beauty and skincare aisle at your local drugstore or even the condiment aisle at the market. Make sure the bottle is long enough to allow for the felt to stretch down, and that it is the same size or smaller than your doll's head. If necessary, you can pad a smaller bottle with muslin or felt to make it larger. The 16 oz. vinegar bottle used in this tutorial measures 4 1/4" around the cap and 6 1/4" around the "brim".

Additional supplies needed:
A good quality wool felt.  I used a 9" x 11" piece.
Rubber band
Foil
Saran Wrap
Scissors
Steam iron or steamer
Press cloth
Assorted ribbon and trim


Step 1.  Prepare the "hat block" by covering the bottle with foil. Cover the foil with saran wrap.


Step 2:  Thoroughly wet felt under the faucet with hot water, stretching the felt in all directions. This will loosen the fibers and make it easier to stretch and smooth. Blot excess moisture with a paper towel. Center the felt over the bottle, smooth down sides and secure with a rubber band. Begin pulling and smoothing excess felt below the rubber band until it is smooth and wrinkle-free above the rubber band. Take your time. Once you are satisfied with the results, let it dry for at least 24-hours. Tip: To make sure the "crown" remained well-defined as it dried, I wrapped a piece of saran wrap firmly around the cap and secured with a small piece of scotch tape as shown above.


Step 3:  Once dry, remove the rubber band, and take the hat off of the bottle. With scissors, trim just above the indention line created by the rubber band.


Step 4:  Determine the desired width of the brim. Turn under the excess amount. This will clean finish the inside of the hat and give support to the brim. Place your hat back on the "hat block". Cover with a press cloth and steam the brim. Let dry thoroughly. You are now ready to trim your new hat.

Phoenix Gene Marshall wears Smart Set from Ashton Drake.
Portfolio from Mattel.

Here is a simple alternative for finishing the edge of the brim:

Trim the edge with scissors to the desired finished width. You can use dressmaker's chalk or even painter's tape as a cutting guide if needed. I find the hat is easier to mark when left on the "hat block". Soften the cut edge of the felt by lightly sanding with the finer side of an emery board. Click HERE to see a variation of Gene's lampshade style hat using this finishing technique.

Resources:
Wool felt is available from Edinburgh Imports, Inc.
The Art of Making Miniature Millinery by Timothy Alberts, Hobby House Press, Inc.

Sunday, March 20, 2016

Asian-Inspired Spring Hat for Gene Marshall & Friends

An Easy DIY Project.


Pearls and Pink Ivy Jordan

The Asian conical or "coolie" style hat is simple to make and oh so chic! This versatile topper is the perfect complement for dresses and suits, as well as casual and beach wear. Here's what you will need:

5 inch square lightweight fashion fabric
5 inch square lining fabric
5 inch square buckram
Circle template (For this tutorial, I used a Gene Marshall stand from Integrity)
Marking tool
Scissors
Straight pins
Sewing needle
Thread to match fabric
Double Fold Bias Tape
Tape measure
Assorted trims (millinery florals, pre-made bows, feathers, etc)
Glue to attach trims (I like Fabri-Tac by Beacon Adhesives)


fig.1 - Cut one circle each of fashion fabric, lining fabric, and buckram using your circle template. Cut a slit to the center of the circle in the buckram piece only as shown above.


fig.2 - Place the fashion fabric over the buckram with the outer edges aligned and pin. To clean finish the back slit, smooth the fabric over one side of the cut edge of the buckram as shown above and overlap 1-5/8 inches. Secure with a pin.


fig.3 - With matching thread, stab stitch along the back seam close to the edge and going all the way through to the underside catching the buckram to secure. Baste close to the edge of the circle. The stitches will be covered with the bias tape.


fig.4 - Insert the lining to the underside of the hat and overlap to fit, keeping edges aligned. Baste close to the edge as shown above.


fig.5 - Apply bias tape as shown and slip stitch in place. For a neat finish at the back seam, fold ends of bias tape under 1/4". Turn the hat over and repeat. You are now ready to embellish your hat as desired.

Here are two more variations.....
Color Deal Ivy Jordan
Miss Jordan wears a navy and white cotton gingham conical hat edged with navy double fold bias tape, accented with a second row of the bias tape and two small flowers.  Hat and matching gloves are from The Couture Touch. Coral jewelry is from D.A.E. Originals, and the handbag is from Robert Tonner's Brenda Starr Collection. Ladies Who Launch 2-piece ensemble is from Integrity.

Caribbean Kiss Gene Marshall
Miss Marshall goes for drama in a conical hat of Aida cloth typically used for cross-stitch embroidery. The binding was made from plaid flannel using a bias tape maker. The crown is embellished with a circle of green velvet wired trim accented with floral trim and millinery leaves. Hat, dress and necklace are from The Couture Touch, gloves are from Ashton Drake. Fur muff and bracelet are from Integrity.

Need more inspiration?
Actress Gene Price wearing a straw conical hat topped with brightly 
colored nasturtiums, circa 1939.
Photo courtesy 1930's Fashion, The Definitive Sourcebook.

From Australian Woman's Weekly, 1954.
Photo courtesy Tanith Rowan.

Delightful straw topper with black coiled trim.

For more on this delightful Asian-inspired hat style, click HERE.

Photo Credits:

Pearls and Pink Ivy Jordan and Color Deal Ivy Jordan are from Integrity.
Pearls and Pink Ivy wears an OOAK ensemble from The Couture Touch.
Caribbean Kiss Gene Marshall is from Ashton Drake.

Thursday, August 13, 2015

1940's Style Sculptural Wool Felt Hat for Gene Marshall

An easy DIY project.


Gene Marshall

Madra Lord

These sculptural winged toppers are fashioned from two simple geometric shapes: a circle and a triangle. They are made from wool felt, one of the most commonly used material in the millinery industry. Wool felt can be blocked, steamed, and stretched in any direction; and it retains it's shape beautifully. 


Here's what you will need:


Wool felt  [See the end of this tutorial for resources]
Scissors
Sewing needle and matching thread
Dressmaker chalk or other marking tool
Emery board
Ruler or tape measure
A glass or other round object for tracing a circle
Assorted trims
Glue (optional)


For the base of the hat, trace a 2 1/2" diameter circle on wool felt and cut out. Cut out a 1/2" wedge as shown. The decorative wings are formed from a 3" triangle. To give the wings a sculptural look, cut along the cutting lines as shown above. To mark the curve, you can either eye-ball it or measure in approximately 5/8 - 3/4" on the diagonal side of the triangle. Draw the curve cutting line with a marking tool. Trim off the excess felt. Make a cut to the point of the triangle leaving 1/4". Soften all cut edges of the felt by lightly sanding them with the finer side of an emery board. Note: If desired, you can adjust the size of your hat depending on the hairstyle or the size of the doll.


Overlap the circle 1/4" and off set the edge 1/8 - 1/4" as indicated by the arrow above. Hand stitch in place. This creates a little bump in the center of the circle which helps shape the base of the hat.  For the wings, twist the triangle shape 3 times and tack in the middle with a needle and thread to secure.


Place the wings over the overlapped portion of the circle and tack in place. Now you can decorate your hat as desired. For Gene's hat, I cut a second pair of wings from charcoal felt for contrast. The 1/2" wedge cut out from the circle was layered on top and beading was added. Madra's hat is decorated with feathers, berries, and beading. The hats are attached to the hairdo with hatpins. You can make your own decorative hatpins using corsage pins or extra-long dressmaker pins and add various beads.


Here is an easy, whimsical cocktail hat variation for Miss Marshall:


Gene Marshall


Cut out a 2 1/2" diameter circle in wool felt. Cut out a 1/2" wedge. Fold up one side of the circle keeping the outer edge even as shown in fig.1. Make a tiny snip with scissors as indicated by the arrow. 


Pull the opposite side of the circle through the slit. This will provide shaping for your hat. Fig. 2 shows the top of the hat and fig.3 the underside. The secret is not to cut the slit too long. You will want the felt to fold as shown above. Decorate your hat as desired.

Miss Gene Marshall

Resources and Credits:

Wool felt is available from Edinburgh Imports.com  They offer an excellent weight felt for doll hats and it comes in a wide assortment of yummy colors. The felt can be purchased by the yard or by the piece. The piece size is 9 x 11 inches. Wool felt may also be available at some fabric and craft stores such as JoAnn Fabrics or Hobby Lobby. Be sure you purchase wool felt, not the synthetic craft felt.

Symphony in G Gene Marshall and Black Widow Madra Lord are from Ashton Drake.
Cocoa Crisp Gene Marshall is from Integrity.
White Orchid Gene Marshall is from JamieShow.

Thursday, June 25, 2015

Decorating Straw Hats for Gene Marshall & Madra Lord

Photo courtesy chronicallyvintage.com

Trimming a straw hat can be as simple as some ribbon and flowers, or as elaborate as you like including feathers, veiling, buttons, bows, birds, leaves, and fruit. Straw can even be dyed, painted, embroidered or appliqued. With a little imagination, a basic straw hat can easily be transformed into a chic and sophisticated topper.


Here's an easy DIY project to take your favorite miniature diva from Spring to Summer to Fall. Straw doll hats can be purchased at your local craft store, or you can utilize straw hats you already own. For this tutorial, I used hats from some of my Fashion Royalty, Barbie, and other 1/6 scale dolls. The scale works perfectly for Miss Marshall's (and Miss Lord's) vintage-inspired hats.


From left to right:  An unidentified 1/6 scale straw hat, a red straw hat from a small antique reproduction doll, and the hat from Mattel's "Country Bound" Silkstone Barbie ensemble. All of the original trim has been removed. In addition to your hat, you will need scissors, needle and thread and/or glue (I like Fabri-Tac by Beacon Adhesives), assorted ribbons and trims.

Gene Marshall
With the drama of pairing black with natural straw, the hat from Barbie's "Country Bound" fashion takes a detour to city chic. Double-Fold Bias Tape was used to trim the hat. A tiny black suede bow finishes the back. The trim was applied using a needle and matching thread or you could use glue. Miss Marshall added a black jersey bandeau to wear underneath the hat. Pin-striped suit is from Robert Tonner's Brenda Starr Collection, blouse is from Integrity, and gloves are from Ashton Drake.

Gene Marshall
Miss Marshall updates the two-piece jacket and dress ensemble from Ashton Drake's "Sunday Afternoon" with a smart and sassy red straw hat accented with a 5/8" wide navy grosgrain ribbon, navy vintage veiling, and miniature fruit recycled from an old hat. Navy handbag is from Robert Tonner's Brenda Starr Collection.

Madra Lord
The side of the original straw hat now becomes the front of Miss Lord's new, perfectly shaped, 1930's-style topper. The striped band was made by applying two widths of ribbon recycled from Ashton Drake's ribbon-tie shoes to a 3/8" wide black grosgrain ribbon. For the custom band, apply a thin line of Fabri-Tac glue to the grosgrain ribbon using a straight pin. Place the narrow ribbon on top of your glue line and smooth it with your finger. For a secure bond, cover with a stack of books for approximately 24 hours. The trim was attached to the hat with needle and matching thread, and accented with a few beads. OOAK suit and gauntlet gloves are from The Couture Touch, scarf is from Mattel, handbag is from Ashton Drake.


Need more inspiration? Here are a few more vintage hats from around the web.

Lamp shade style hat with florals encircling the crown.
Photo courtesy melamela.co.uk

At first glance, I thought this might be a bias-strip of floral fabric.
At closer look, it's flowers and leaves covering the entire brim.
Fabric ruched and tacked to the brim might be interesting.

A unique treatment of ribbon. Circa 1940's. Photo courtesy Polyvore.

Interesting placement of the green velvet ribbon. Photo courtesy antiquedress.com

Fabulous embroidered straw hat courtesy graciousgood.wordpress.com
You could also use ready-made appliques, or paint your own design with fabric paint.

Credits and Resources:

For resources and detailed directions on binding the edge of a hat with bias binding, CLICK HERE.

"Blue Fox" Gene Marshall is from Ashton Drake.
"C'est Moi" Madra Lord is from Integrity.
"Symphony in G" Gene Marshall, enhanced with an Integrity articulated body, is from Ashton Drake.